ToolBrainy

Author: ToolBrainy Team

  • How to Add a Watermark to a PDF for Free

    How to Add a Watermark to a PDF for Free

    You’re sending a proposal that isn’t final yet, or a design proof a client shouldn’t be forwarding around, and you want the file to say so on every page. A watermark is the obvious answer. The part that trips people up is what happens next: the watermark comes out so faint nobody notices it, or so heavy the document underneath becomes unreadable.

    The other thing worth clearing up early, because we get asked it constantly: a watermark is a label, not a lock. It tells a reader how to treat the document. It does not stop anyone doing anything with it. Once you separate those two jobs, the whole thing gets much simpler.

    What a watermark actually does — and what it doesn’t

    A watermark is text or an image laid over every page, usually semi-transparent. That is the entire mechanism. Which means:

    • It communicates status. DRAFT, CONFIDENTIAL, SAMPLE, or your company name — the reader knows immediately what they’re holding.
    • It discourages casual misuse. Someone is far less likely to forward a proof stamped SAMPLE across three departments.
    • It does not prevent copying, printing, or editing. Anyone with the right software can strip a watermark out. Treat it as a sign on a door, not a deadbolt.

    If you genuinely need to stop people opening or editing a file, that’s password protection, and it’s a different job entirely. Watermarking and protecting are often confused because both feel like “securing the document” — they aren’t the same thing at all.

    The fastest way: add it in your browser

    If you just need the stamp on there now, our free PDF watermark tool does it in a few clicks: type your text, set the opacity and angle, and download. It runs entirely on your device, so the file is never uploaded anywhere — which matters, because the documents people watermark are usually the confidential ones.

    Every page gets the same watermark automatically, so a 40-page contract takes the same effort as a single-page letter.

    Getting it right: a practical checklist

    1. Keep opacity between 10% and 30%. Below 10% it vanishes on screen and disappears entirely in print. Above 30% it starts fighting the text underneath. Around 20% is the sweet spot for most documents.
    2. Go diagonal for status, horizontal for branding. DRAFT and CONFIDENTIAL read best at roughly 45° across the middle of the page. A company name or URL usually sits better horizontally in the footer area.
    3. Use grey, not colour. Grey stays neutral against black text and prints predictably on any printer. Red might look emphatic on screen, but it turns into a muddy smear on a monochrome office printer.
    4. Keep the wording short. One or two words. “CONFIDENTIAL” works; “CONFIDENTIAL — DO NOT DISTRIBUTE OUTSIDE THE COMPANY” becomes an unreadable band of grey.
    5. Watermark last, compress after. Do all your editing first, add the watermark, then run one pass through a PDF compressor if the file needs to be smaller. Watermarking a compressed file and compressing again just stacks up quality loss.
    6. Always keep the clean original. The watermark is baked in once you save. If you later need an unmarked copy, you need the file you started from.

    What to write on it

    The wording does more work than the styling. A few that earn their place:

    • DRAFT — the version isn’t final and shouldn’t be quoted.
    • CONFIDENTIAL — internal only, don’t forward.
    • SAMPLE or PROOF — for work sent before payment or sign-off.
    • Your company name or domain — for reports and whitepapers you actually want shared.
    • The recipient’s name — for documents sent individually. If a copy leaks, you know which one it was.

    That last one is quietly the most effective of the lot. It changes the behaviour of the person holding the file far more than a generic CONFIDENTIAL ever does.

    When a watermark goes wrong

    Two failures come up again and again. The first is the invisible watermark: it looks fine on a bright laptop screen, then prints as nothing at all, because the opacity was set for a backlit display rather than ink on paper. If the document is going to be printed, check it on paper before you send fifty copies.

    The second is the scanned document. If your PDF is a scan — a photographed contract, an exported image — the pages are pictures, not text, and a watermark laid over them can wash out signatures or handwritten notes. Keep the opacity at the very low end for scans, or position the watermark along an empty margin instead of across the middle.

    Questions people ask about PDF watermarks

    How do I add a watermark to a PDF?

    Open the file in a watermarking tool, type your text, set the opacity and angle, then download the result. With a browser-based tool it takes under a minute and every page is stamped automatically.

    Can you add a watermark to a PDF for free?

    Yes. It needs no paid software and no signup. Our tool runs in the browser at no cost, with no limit on the number of files.

    Does a watermark protect my PDF?

    No. It labels the document, it does not secure it. A watermark can be removed by anyone with the right software. For real restrictions you need password protection, which is a separate feature.

    Can a watermark be removed from a PDF?

    Yes, with the right tools. This is exactly why it should be treated as a deterrent and a label rather than a security measure.

    What opacity should a PDF watermark be?

    Between 10% and 30%, with around 20% suiting most documents. Anything fainter risks vanishing in print; anything heavier competes with the text.

    Will the watermark appear on every page?

    Yes. A watermark is applied across the whole document, so every page carries it without you having to repeat the step.

    The short version

    Pick one or two words, set the opacity around 20%, use grey, go diagonal for status and horizontal for branding, and keep an unmarked original. And remember what it is for — a watermark tells people how to treat your document, it does not stop them. When you’re ready, our PDF watermark tool will stamp the whole file in a few seconds.

  • How to Compress Images for Web (Without Them Looking Awful)

    How to Compress Images for Web (Without Them Looking Awful)

    You publish a page, open it on your phone away from wifi, and watch the pictures crawl in one band at a time. Almost always the cause is the same: the images went up exactly as they came off a camera or a designer’s export. A single untouched photo can weigh more than every other part of the page combined, and it’s usually the easiest thing on the whole site to fix.

    A 6 MB photograph, 4000 pixels wide, sitting in a column roughly 700 pixels across. That exact mismatch turns up in more of the uploads we see than any other single problem. Nothing is wrong with the picture itself — it is simply around thirty times larger than the page has any use for, and every visitor pays for the difference.

    Why your images are heavier than they need to be

    • They’re far bigger than the space they sit in. Browsers scale a 4000-pixel image down to fit a 700-pixel column, but the visitor still downloads all 4000 pixels first.
    • The format doesn’t match the content. A photograph saved as PNG can easily be five times the size of the same photo as JPG, with no visible gain.
    • Exports keep quality at maximum by default. Most design tools save at 100% quality, well past the point where anyone can see a difference.
    • Hidden data rides along. Camera metadata, colour profiles and thumbnails add weight that no visitor will ever see.

    The fastest fix: compress in your browser

    If you want the file smaller right now, use a browser-based tool. Our free image compressor re-encodes your image at a sensible quality level and strips the data the web doesn’t need, typically cutting 60–80% off the file with nothing you can spot at normal viewing size.

    It runs entirely on your own device, so nothing is uploaded to a server. That matters if you’re working with client photos, product shots that haven’t launched yet, or anything else you’d rather not hand to a third party.

    Compressing properly: a practical checklist

    1. Resize before you compress. This is the step that does the heavy lifting, and most people skip it. Bring the image down to the largest width it will ever actually be shown at using our image resizer — usually 1600–2000 px for a full-width banner, and far less for anything in a column.
    2. Crop away what you don’t need. Empty sky and background are still pixels you’re paying to send. A tighter crop often improves the picture as well as the file size.
    3. Choose the right format. Photos want JPG or WebP; logos, icons and screenshots want PNG or WebP. Our image converter handles the switch, and there’s more detail in our guide to JPG vs PNG vs WebP.
    4. Then compress. Around 75–85% quality is the sweet spot for photographs. Below roughly 60% you start to see it.
    5. Keep the original. Compression is one-way. Store one clean master copy so you can start again if you ever need a bigger version.
    6. Check it at full size on a real screen. Zoom to 100% and look at faces, fine text and any flat areas of sky or wall — that’s where problems show first.

    What to actually aim for

    Useful targets rather than rules, for typical website images:

    • Full-width hero image: 1600–2000 px wide, under 200 KB.
    • In-article or blog image: 1000–1200 px wide, under 100 KB.
    • Product thumbnail or card: 400–600 px wide, under 40 KB.
    • Logo or icon: exact display size, under 20 KB.
    • Whole page: try to keep every image on it adding up to under 1 MB.

    If a single image on your site is over 500 KB, it’s almost certainly resizeable rather than un-compressible.

    When compression genuinely shows

    Some images resist compression, and it’s worth knowing which so you don’t blame the tool. Screenshots containing small text go mushy quickly, because the sharp edges are exactly what lossy compression discards first. Large flat gradients — a clear sky, a plain studio backdrop — can develop visible banding. Illustrations with hard lines suffer in the same way photographs don’t.

    The pattern we run into most is people compressing an already-compressed file. Each pass discards a little more, and after three or four rounds a photo looks visibly rough for no extra saving. If an image already looks slightly soft before you start, go back to the original rather than squeezing it again. For anything with text or sharp edges, switch it to PNG or WebP instead of pushing the JPG quality lower.

    Questions people ask about compressing images

    How much can I compress an image before it looks bad?

    For photographs, 75–85% quality is invisible to almost everyone. The visible threshold usually sits somewhere around 60%, and lower for images containing text.

    Should I resize or compress?

    Both, in that order. Resizing removes pixels you never needed; compressing makes the remaining pixels cheaper to store. Resizing saves far more.

    Does compressing images actually help SEO?

    Indirectly, yes. Page speed is a ranking signal and image weight is usually the largest single factor in it. The bigger effect is on visitors, who leave slow pages.

    Is WebP worth switching to?

    For the web, generally yes — typically 25–35% smaller than JPG at matching quality, with support in every current browser. Keep a JPG if the file also has to open in older desktop software.

    Will compressing remove my image’s metadata?

    Usually, and that’s normally a good thing for the web. If you need to keep copyright or camera data, check the tool’s behaviour and keep an untouched original either way.

    Before you upload

    Resize first, pick a format that suits the content, compress once, and keep the master copy. Those four habits will take most sites from sluggish to quick without changing a single line of code. When your images are ready, run them through our image compressor and check the saving before you upload.

  • How to Convert JPG to PDF (and Keep It Looking Right)

    How to Convert JPG to PDF (and Keep It Looking Right)

    You have eight photos of a signed form, or a pile of receipts your accountant wants, and the instruction is always the same: send it as one PDF. Attaching eight separate JPGs looks careless, and whoever receives them has to open each one in turn. The conversion itself takes about thirty seconds — it’s the order, the orientation and the file size that quietly cause all the trouble.

    The pattern we run into most often is not really a conversion problem at all. Someone converts their images one at a time, ends up with eight separate PDFs, then goes hunting for a merge tool to undo the mess. What they wanted from the start was simply “all of these in one file, in this order, the right way up.” Get that sequence right and the rest takes care of itself.

    Why you keep getting asked for a PDF

    Images are fine for looking at. PDFs are what organisations ask for, and usually for good reasons:

    • One file, one fixed order. Pages stay in sequence. Nobody has to work out whether IMG_4471 comes before or after IMG_4468.
    • It prints predictably. A PDF carries a page size, so it comes out of the printer the way you intended rather than filling a sheet at random.
    • Upload forms often accept nothing else. Job applications, visa portals, insurance claims and university submissions frequently reject image files outright.
    • It opens anywhere. Phone, laptop, an ancient office PC — a PDF looks identical on all of them.

    The fastest fix: convert in your browser

    If you just need the file now, use a browser-based converter. Our free JPG to PDF converter lets you select several images at once, arrange them into the order you want, and export the lot as a single PDF. There’s no signup and no watermark.

    The part that matters most for documents: it runs entirely in your browser, so your files are never uploaded to a server. If you’re converting an ID card, a bank statement or a signed contract, that difference is worth caring about.

    Converting cleanly: a practical checklist

    1. Sort your files before you start. Most converters add images in the order you select them. Renaming to 01, 02, 03 takes a moment and saves you re-ordering pages later.
    2. Rotate first, not after. Sideways pages are the single most common complaint, and they’re far easier to fix in the image than in the finished PDF.
    3. Crop out the desk. Photos of documents almost always include the table edge, a shadow or your thumb. A quick pass with our crop tool makes the result look scanned rather than snapped.
    4. Shrink oversized photos. A modern phone photo is far more detail than any A4 page needs. Running them through our image compressor first keeps the PDF small without any visible difference.
    5. Convert odd formats up front. If your files are HEIC, WebP or PNG, put them through our image converter first so everything behaves consistently.
    6. Open the finished PDF before you send it. Check every page is present, upright, and readable at 100% zoom. Ten seconds here prevents a resubmission.

    Page size and resolution: what to actually pick

    Two settings decide how your PDF looks. Neither needs much thought once you know the rule:

    • A4 (210 × 297 mm) — the default nearly everywhere outside North America. Use it for anything official.
    • Letter (8.5 × 11 in) — use this if the document is going to the US or Canada.
    • Fit to image — the page takes the shape of your photo. Good for artwork and screenshots, wrong for anything that will be printed.
    • 150 DPI is plenty for reading on screen and emailing. 300 DPI is only worth it for professional printing.

    As a rough guide, a 12-megapixel phone photo (about 4000 × 3000 pixels) already exceeds 300 DPI on an A4 page. You are almost never short of resolution — you’re far more likely to have too much of it.

    When it genuinely goes wrong

    Three problems account for most bad conversions. Pages come out rotated, because phones store orientation as hidden metadata that some tools ignore. The file lands at 30–40 MB, because ten untouched phone photos were dropped straight in. Or the text is legible on screen but mushy when printed, because the original photo was taken at an angle in poor light.

    The pattern we see most often is the last one: the conversion is blamed when the photograph was the real problem. No converter can add detail that the camera didn’t capture. Retaking the photo flat, in daylight, with the document filling the frame will beat any setting you can change afterwards. If the file is simply too big, convert first and then run the result through our PDF compressor — that’s usually enough to clear a 10 MB upload limit.

    Questions people ask about converting JPG to PDF

    Can I put several JPGs into one PDF?

    Yes. Select all the images together, arrange them into the order you want, and export once. You’ll get a single multi-page PDF rather than one file per image.

    Does converting to PDF reduce image quality?

    Not by itself. A straight conversion embeds your image as it is. Quality only drops if you deliberately apply compression, or if you resize the image down beforehand.

    Why is my PDF so much bigger than the photos?

    It usually isn’t — it’s the sum of them, plus a little overhead. Ten 4 MB photos make a roughly 40 MB PDF. Compress the images first, or the PDF afterwards.

    Does it work with PNG, WebP or iPhone HEIC files?

    PNG and WebP generally convert without trouble. HEIC is less widely supported, so convert those to JPG first and the rest of the process is identical.

    Is it safe to convert ID documents or bank statements?

    With a browser-based tool that processes files on your own device, nothing is uploaded anywhere, which makes it far safer than a service that sends your document to a server. Always check how a tool handles files before trusting it with anything sensitive.

    Before you send it

    Get the order right, rotate and crop before converting, and pick A4 unless you’re sending to North America. Those three habits cover almost every problem people run into. When your images are ready, drop them into our JPG to PDF converter and you’ll have one tidy document in a few seconds.

  • How to Crop an Image Without Losing Quality

    How to Crop an Image Without Losing Quality

    You find the perfect photo, but there’s a stray elbow in the corner, or the subject is floating somewhere off to the left. You crop it, save it, and suddenly the whole thing looks a little soft — slightly blurry edges, text that isn’t quite as crisp as it was. The frustrating part is that cropping itself is not what damaged your image. Something else did, and once you know what, it’s easy to avoid.

    We built ToolBrainy’s cropper after seeing this same complaint arrive in the same shape over and over: someone crops a photo, looks at the result, and concludes the tool degraded it. Almost every time, the crop was innocent. The damage happened either before the image reached the editor or after it left. Here is what is actually going on.

    Cropping does not reduce quality — three other things do

    Cropping simply discards the pixels outside your selection. The pixels that remain are completely untouched. What actually costs you quality is what happens around the crop:

    • Re-encoding a JPEG. Every time you save a JPEG, it is compressed again, and each pass throws away a little more detail. Crop the same photo five times and you’ll see it.
    • Upscaling after the crop. A tight crop leaves you with fewer pixels. If you then stretch that smaller image back to the original display size, the software is inventing detail that was never there.
    • Cropping from an already-compressed copy. Starting from a WhatsApp download or a screenshot of a screenshot means the damage was done long before you opened the editor.

    Fix those three, and a crop costs you nothing at all.

    The fastest way: crop it in your browser

    If you just need a clean crop right now, a browser-based editor is the quickest route. Our free image cropper lets you drag a selection, lock a preset aspect ratio, and download the result in a couple of clicks. It runs entirely on your device, so your photo is never uploaded to anyone’s server — which matters for ID documents, screenshots of private messages, or anything else you’d rather not hand over.

    For most images a single crop is all you need, and because you’re starting from your original file, there’s no stacked compression to worry about.

    Crop without losing quality: a practical checklist

    1. Always start from the original file. Not the version someone sent you on WhatsApp, not a screenshot. Keep one untouched master copy and crop from that every time.
    2. Decide the aspect ratio before you drag. Cropping freehand and then forcing it into a 1:1 square later means cropping twice. Lock the ratio first and you crop once.
    3. Never crop tighter than your final display size. If your image needs to appear 1200 px wide, don’t crop down to 600 px and scale it back up. Check the pixel dimensions of your selection as you go.
    4. Save as PNG or WebP when the image has text. Screenshots, diagrams, and anything with fine lettering hold up far better in a lossless format. Our image converter handles the switch.
    5. Crop first, compress last. Do all your cropping, then run one compression pass at the end with an image compressor. Compressing between every edit is what stacks up the damage.

    Aspect ratios worth memorising

    Most cropping headaches come from guessing the ratio and discovering later that the platform has cut your subject’s head off. A few worth knowing:

    • 1:1 — Instagram posts, profile pictures, product thumbnails.
    • 4:5 — Instagram portrait, the ratio that takes up the most feed space on a phone.
    • 16:9 — YouTube thumbnails, presentation slides, website hero images.
    • 9:16 — Stories, Reels, TikTok, and anything else vertical.
    • 3:2 — Standard photo prints, and what most cameras shoot natively.

    If you need a specific pixel size rather than a ratio, crop for composition first and then set exact dimensions with an image resizer.

    When a crop genuinely goes wrong

    There are a few situations where quality loss is real and no amount of care will hide it. Cropping deep into a low-resolution image is the main one — if the original is only 800 px wide, a 50% crop leaves you 400 px, and nothing can put that detail back. Heavily compressed JPEGs are another: crop into an image that already has visible blocky artefacts and you simply magnify them.

    By far the most common version we come across is the messaging-app round trip. A photo gets sent through a chat app, which compresses it on the way to save bandwidth; the recipient saves that compressed copy and crops it. The crop then gets blamed for softness that was baked in during the transfer. If you can still get the file off the original camera roll, or ask for it as a document attachment rather than a photo, you skip that entire problem.

    Questions people ask about cropping images

    Does cropping an image reduce its quality?

    No. Cropping only removes pixels from the edges; the remaining pixels are unchanged. Any softness you notice comes from re-saving a JPEG, or from enlarging the cropped result afterwards.

    Does cropping reduce the file size?

    Usually yes, because there are fewer pixels to store. A tight crop can cut the file size substantially without any compression at all.

    What is the best format to save a cropped image in?

    PNG or WebP if the image contains text, screenshots, or sharp graphics. JPEG is fine for photographs, as long as you’re not saving repeatedly.

    Can I undo a crop after saving?

    Not from the saved file — those pixels are gone for good. This is why keeping one untouched original matters more than any other tip here.

    How do I crop to an exact pixel size?

    Crop for composition first, then set the precise dimensions separately. Trying to do both at once usually means cropping twice and compressing twice.

    The short version

    Keep one clean original, decide your aspect ratio before you start dragging, never crop below the size you actually need, and compress once at the very end. Do that and your crops will look exactly as sharp as the day the photo was taken. When you’re ready, open our image cropper and it’s a ten-second job.

  • How to Test a REST API Online Without Installing Anything

    How to Test a REST API Online Without Installing Anything

    The first API bug that really cost me an afternoon was a 401 Unauthorized that had nothing to do with my credentials. The key was correct. The endpoint was correct. What was wrong was that I had typed Authorisation instead of Authorization in the header name, and the server did what servers do: it ignored the header it did not recognize and told me I was not logged in.

    I found it in about ten seconds once I stopped guessing and actually sent the request somewhere I could see every part of it. That is really all API testing is: making the invisible parts of a request visible so you can tell which one is wrong.

    What “testing an API” actually means

    When your app talks to an API, a lot happens that you never see. Your code builds a request, a library adds headers you did not write, the server responds, and somewhere in the middle something breaks. Testing an API means taking your application out of the loop entirely and sending the request by hand, so you can answer one question: is the problem my code, or is it the API?

    That single question saves enormous amounts of time. If the request works when you send it manually, the bug is in your code. If it fails the same way manually, the bug is in your request, your credentials, or the API itself. You have just cut the search space in half.

    Every request has exactly four parts

    No matter how complicated an API looks, every request you will ever send is built from the same four pieces. Once you can see all four, debugging gets much easier.

    1. The method. The verb: GET, POST, PUT, PATCH, or DELETE. It tells the server what kind of operation you want.
    2. The URL. The address of the resource, including any query parameters after the ?.
    3. The headers. Metadata about the request: what format you want back, who you are, what content you are sending.
    4. The body. The actual data you are sending, usually JSON. GET and DELETE normally have no body.

    A minimal request looks like this:

    GET https://api.github.com/users/octocat
    Accept: application/json

    You can send exactly that from the free online API tester without installing anything. Pick the method, paste the URL, hit send, and read what comes back.

    Picking the right method

    Using the wrong verb is one of the most common reasons a request fails with a confusing error. The convention is consistent across almost every REST API:

    • GET retrieves data and changes nothing. Safe to repeat.
    • POST creates something new. Repeating it usually creates duplicates.
    • PUT replaces a resource entirely with what you send.
    • PATCH updates only the fields you include.
    • DELETE removes the resource.

    The PUT versus PATCH distinction catches people out constantly. If you send a PUT with only one field, a strict API will treat every field you left out as deliberately blanked. When you only mean to change one thing, PATCH is almost always what you want.

    Reading the response

    The status code is the first thing to look at, and it tells you far more than most people use it for. The pattern is simple: 2xx means it worked, 4xx means you made a mistake, 5xx means the server made a mistake.

    • 200 OK — success, with data in the body.
    • 201 Created — your POST worked and something new exists.
    • 204 No Content — success, but there is deliberately nothing to return. Common after a DELETE.
    • 400 Bad Request — the server could not parse what you sent. Usually malformed JSON.
    • 401 Unauthorized — the server does not know who you are. Your credentials are missing, malformed, or expired.
    • 403 Forbidden — the server knows exactly who you are and you are not allowed. Do not go looking for a credentials bug here.
    • 404 Not Found — wrong URL, or the resource genuinely does not exist.
    • 422 Unprocessable Entity — your JSON was valid but the values failed validation. The body usually says which field.
    • 429 Too Many Requests — you hit the rate limit. Look for a Retry-After header.
    • 500 Internal Server Error — the API crashed. Not your fault, though a malformed request can sometimes trigger it.

    The 401 versus 403 distinction is worth committing to memory. It is the difference between “I don’t know you” and “I know you, and no.” People burn hours regenerating perfectly good API keys because they read a 403 as an authentication problem.

    Your first request, step by step

    Open the API tester and try a real public endpoint that needs no key:

    1. Set the method to GET.
    2. Enter https://api.github.com/users/octocat as the URL.
    3. Add a header: name Accept, value application/json.
    4. Send it.

    You should get a 200 back with a JSON object describing that account. Now change the username to something that does not exist and send it again. You will get a 404 with a short JSON body explaining the problem. That contrast, the same request succeeding and failing on one small change, is the whole debugging loop in miniature.

    Next, try sending data. This endpoint accepts test posts and echoes back what it received:

    POST https://jsonplaceholder.typicode.com/posts
    Content-Type: application/json
    
    {
      "title": "Testing an API",
      "body": "Sent from a browser.",
      "userId": 1
    }

    The Content-Type header matters here. Leave it off and many servers will not parse your body at all, then reject the request for missing fields you clearly sent. If the response comes back as a dense unreadable blob, paste it into the JSON formatter to expand it, and to confirm your own request body was valid JSON in the first place.

    Authentication: the three patterns

    Nearly every authenticated API uses one of three approaches, and all three are just headers.

    Bearer tokens are the most common. You send a token issued by the API:

    Authorization: Bearer YOUR_TOKEN_HERE

    The word Bearer, the single space, and the exact spelling of Authorization all matter. If the token is a JWT, you can check what is inside it and whether it has already expired using the JWT decoder. An expired token is a very common cause of a sudden 401 on code that worked yesterday.

    API keys come in a custom header, and the name varies by service:

    X-API-Key: YOUR_KEY_HERE

    Some APIs instead want the key as a query parameter. Check the docs, because guessing wastes time.

    Basic auth sends a username and password Base64-encoded. It is the oldest pattern and still turns up in internal and legacy systems. If you need to build or inspect one by hand, the Base64 encoder handles the encoding step. Worth remembering: Base64 is encoding, not encryption, so Basic auth over plain HTTP is effectively sending your password in the clear.

    Why the browser sometimes blocks you

    This is the one thing that confuses people testing APIs from a browser, and it is worth understanding rather than fighting.

    Browsers enforce CORS, a security rule that stops a page on one domain from freely reading responses from another domain. If the API does not explicitly send back a header saying “requests from other origins are allowed,” the browser refuses to hand you the response, even though the server answered perfectly well.

    The important part: a CORS error is not an API error. The request usually succeeded. The browser is simply declining to show you the result. Signs you are looking at CORS rather than a real failure:

    • The status shows as 0, or there is no status at all.
    • The error mentions “origin”, “cross-origin”, or “Access-Control-Allow-Origin”.
    • The same URL works fine when you open it directly in a new tab.

    Public APIs designed for browser use, like the two in the examples above, send the right headers and work fine. Internal APIs and many paid services do not, by design. For those, test from a server-side tool or ask whoever runs the API to allow your origin.

    The errors you will actually hit

    • 401 on a key you know is right → check the header name spelling and that the word Bearer is present with one space after it.
    • 400 on a body that looks fine → run it through a JSON validator. A trailing comma or a smart quote from a word processor will do it.
    • Server ignores your data → you almost certainly forgot Content-Type: application/json.
    • 404 on a URL you copied from the docs → check for a missing or doubled slash, or a version prefix like /v1/ you left out.
    • Query parameters not working → special characters need escaping. The URL encoder shows you what your parameters really look like once encoded.
    • Worked yesterday, 401 today → the token expired. Decode it and check the expiry claim.

    Habits that save time

    • Change one thing at a time. When you edit the URL, the headers, and the body together, a fix and a new bug cancel out and you learn nothing.
    • Get a GET working first. Prove your credentials work on a simple read before debugging a complex write.
    • Read the response body, not just the status. Most APIs explain the exact problem there, and most people never scroll down to it.
    • Never paste production tokens into tools that send them to a server. A live token is a working key to your account until it expires. Prefer tools that run in your browser.

    Frequently asked questions

    Can I test an API without installing Postman?

    Yes. A browser-based tool like the free online API tester sends the same requests with no install and no account. That makes it the practical option on a locked-down work laptop or a Chromebook where you cannot install desktop software.

    What is the difference between 401 and 403?

    A 401 means the server could not identify you: your credentials are missing, malformed, or expired. A 403 means it identified you successfully and you do not have permission for that action. Regenerating your API key will not fix a 403.

    Why do I get a CORS error when the API works in a browser tab?

    Opening a URL directly is not a cross-origin request, so CORS does not apply. Sending it from a page on a different domain is, and the browser will block you from reading the response unless the API sends an Access-Control-Allow-Origin header. The request itself usually succeeded.

    Should I use PUT or PATCH to update something?

    Use PATCH when you want to change specific fields and leave the rest alone. Use PUT when you are replacing the whole resource. Sending a partial PUT can blank out every field you omitted.

    Is it safe to test with a real API key?

    Only in tools that keep the key on your device rather than sending it to their own server, and ideally with a development or read-only key rather than a production one. Rotate any key you have pasted somewhere you are unsure about.

    Why does the server ignore the data I send?

    Almost always a missing Content-Type: application/json header. Without it many frameworks never parse the body, so the server behaves as though you sent nothing and complains about missing required fields.

    The short version

    Testing an API is just sending the four parts of a request by hand so you can see which one is wrong. Read the status code first, then the response body. Remember that 401 and 403 are different problems, that a missing Content-Type silently discards your data, and that a CORS error is the browser talking, not the API. Get a simple GET working before you debug anything complicated, and change one variable at a time.

    When something breaks, open the API tester, rebuild the request piece by piece, and let the response tell you where the problem is. It is usually a header, and it is usually spelled slightly wrong. You can find the rest of the developer tools in one place when you need them.

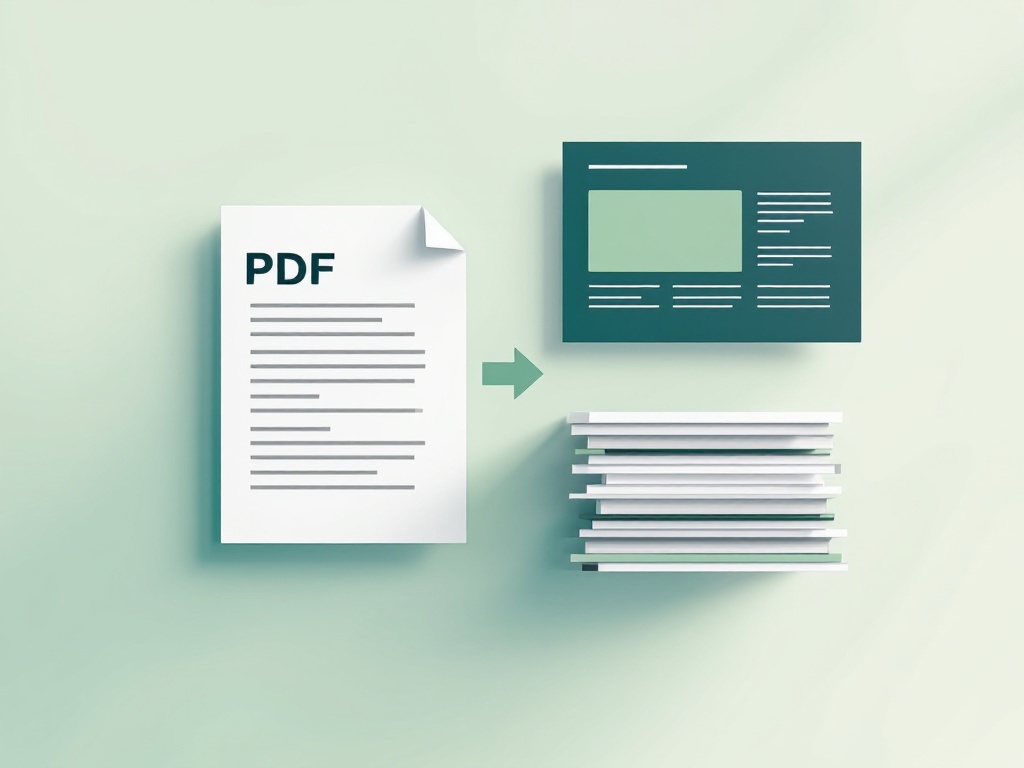
  • How to Convert a PDF to PowerPoint (Free, No Signup) — 2026 Guide

    How to Convert a PDF to PowerPoint (Free, No Signup) — 2026 Guide

    If you have ever been handed a PDF an hour before a meeting and told to “put it on slides,” you know the small panic that follows. The good news: converting a PDF into a PowerPoint presentation is quick, and you do not need paid software or an account to do it. This guide walks through three free methods, when to use each, and how to keep your text editable afterward.

    The short answer

    Yes, you can convert a PDF to PowerPoint for free. The fastest route is a browser-based converter like the free PDF to PowerPoint tool — upload your PDF, download a .pptx file, done. If you need every word to stay editable, you can also rebuild the deck inside PowerPoint or Google Slides. Below is exactly how each method works and which one fits your situation.

    Method 1: Use a free online PDF to PowerPoint converter

    This is the method most people want: no install, no signup, works on any device including a phone. Here is the process step by step.

    1. Open the PDF to PowerPoint converter in your browser.
    2. Drag your PDF onto the upload area, or click to browse and select it.
    3. Wait a few seconds while each PDF page is placed onto its own slide.
    4. Download the resulting .pptx file and open it in PowerPoint, Keynote, or Google Slides.

    Every page of the PDF becomes a slide, so a 12-page PDF gives you a 12-slide deck with the layout preserved. Because the conversion runs in your browser, your file is not stored on a server after you leave the page — handy when the document is confidential.

    Method 2: Convert inside PowerPoint itself

    If PowerPoint is already open and you want the content as fully editable slides, you can bring the PDF in directly:

    • Insert as an object: Go to Insert › Object › Create from file, choose your PDF, and it drops onto the slide. Good for showing a single page, less good for a full deck.
    • Copy the text: Open the PDF, select the text you need, and paste it onto a slide. This gives you clean, editable text but drops the original layout — you rebuild the design yourself.

    Use this route when the deck matters more than speed and you want pixel-level control over every slide.

    Method 3: The Google Slides route

    No PowerPoint installed? Google Slides works entirely in the browser and exports to .pptx:

    1. Convert the PDF to slides using Method 1, then open the file in Google Slides (File › Open).
    2. Edit freely, then export with File › Download › Microsoft PowerPoint (.pptx).

    This is the best free option if you are on a Chromebook or a locked-down work laptop.

    Which method should you pick?

    • Need it in 30 seconds? Method 1 — the online converter.
    • Need every word editable and on-brand? Method 2 — copy the text into your own template.
    • No Office software at all? Method 3 — Google Slides.

    Can you edit the text after converting?

    This is the question that trips people up. When a converter turns each PDF page into a slide, it often places the page as a high-fidelity image or as text boxes, depending on how the original PDF was built. If your PDF was exported from Word or PowerPoint, the text usually stays selectable. If it was scanned from paper, the “text” is really a picture, and you will need optical character recognition first — our free OCR tool can pull editable text out of a scanned page before you drop it onto a slide.

    Tips for the cleanest result

    • Flatten complex PDFs first. If the file is huge or slow, run it through a PDF compressor before converting.
    • Split long documents. Turning a 60-page report into slides rarely reads well — pull out only the pages you need.
    • Check fonts. If a font is not installed on the machine that opens the deck, PowerPoint substitutes a similar one. Stick to common fonts or embed them.
    • Convert, then polish. Treat the converted deck as a starting point: add a title slide, trim dense pages, and space things out.

    Common problems and fixes

    • Text looks like an image and won’t edit → the source PDF was scanned; run OCR first.
    • Slides are the wrong size → set your slide size (16:9 or 4:3) in PowerPoint’s Design › Slide Size after import.
    • Formatting shifted → some layout drift is normal across formats; nudge text boxes or rebuild the busiest slides by hand.

    Frequently asked questions

    How do you convert a PDF to PowerPoint for free?

    Open a free browser-based converter such as ToolBrainy’s PDF to PowerPoint tool, upload your PDF, and download the .pptx file. There is no signup, no watermark, and it works on desktop or mobile.

    Can I convert a PDF to PowerPoint without installing software?

    Yes. Online converters and Google Slides both run entirely in your browser, so nothing needs to be installed. This is the easiest option on a work laptop or Chromebook where you cannot install apps.

    Will the converted slides be editable?

    Text from a PDF that was originally exported from Word or PowerPoint usually stays editable. Text from a scanned document is an image, so run it through an OCR tool first to make it editable.

    Does converting keep my original formatting?

    The page layout is preserved slide-by-slide, but small shifts in spacing or fonts can happen when moving between formats. For a polished deck, treat the conversion as a base and tidy up the busiest slides.

    Is it safe to convert confidential PDFs online?

    Use a tool that processes files in your browser rather than uploading them to a server. ToolBrainy’s converter runs locally, so your document is not stored after you close the page.

    How do I convert just a few pages instead of the whole PDF?

    Extract the pages you need first, then convert only those. This keeps the deck focused and avoids a slide for every single page of a long report.

    The one-minute version

    For most people, converting a PDF to PowerPoint is a 30-second job: drop it into a free online converter, download the .pptx, and polish the slides that need it. Reach for Google Slides when you have no Office software, and rebuild the text by hand when the presentation really has to be on-brand. Whichever route you take, you never need to pay for it.

  • Meta Robots vs Robots.txt: What’s the Difference? (2026)

    Meta Robots vs Robots.txt: What’s the Difference? (2026)

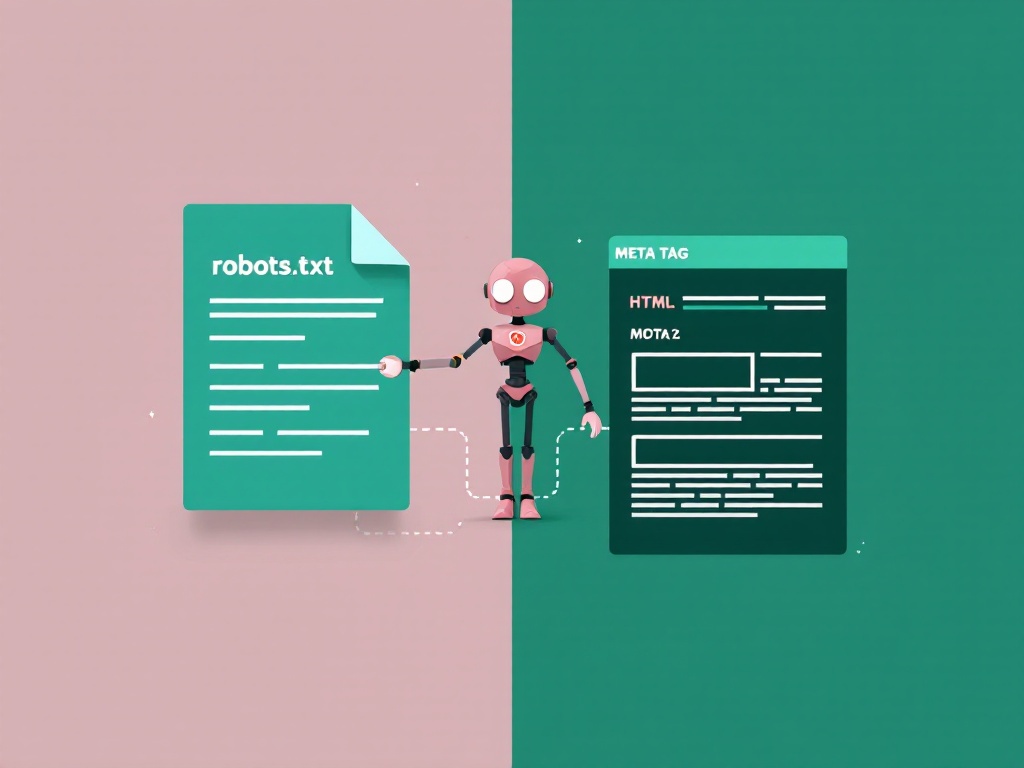
    These two tools sound almost identical, get confused constantly, and control completely different things. Mix them up and you can accidentally keep a page out of Google — or leave a private page fully indexed. Here’s the plain-English difference between robots.txt and the meta robots tag, when to reach for each, and the one mistake that trips up almost everyone.

    The one-sentence difference

    Robots.txt controls crawling (whether a bot is allowed to fetch a page). The meta robots tag controls indexing (whether a page that’s been fetched is allowed to appear in search results). Crawling and indexing are two separate stages, and each tool governs a different one.

    What robots.txt does

    Robots.txt is a single file at the root of your domain that tells crawlers which paths they may or may not request. It’s a crawl instruction, issued before the bot ever loads the page:

    robots.txt

    User-agent: *
    Disallow: /wp-admin/
    Disallow: /cart/
    
    Sitemap: https://example.com/sitemap.xml

    Key point: Disallow stops a bot from crawling a URL — it does not guarantee the URL stays out of Google. If other sites link to a disallowed page, Google can still index the URL (usually with no description, because it was never allowed to read the content). If you need a hosted robots.txt fast, our Robots.txt Generator builds one in your browser, and the complete robots.txt guide covers every directive.

    What the meta robots tag does

    The meta robots tag lives in the <head> of an individual page and tells search engines what to do after they’ve crawled it. The most common use is keeping a page out of the index:

    In the page <head>

    <meta name="robots" content="noindex, follow">

    This says: don’t show this page in search results, but do follow its links. Because it’s a per-page instruction that Google reads directly, noindex is the reliable way to keep a page out of search — unlike a robots.txt Disallow.

    Common values:

    • index, follow — the default; show the page and follow its links.
    • noindex, follow — hide the page, but still crawl its links (great for thank-you pages, filtered listings, thin archives).
    • noindex, nofollow — hide the page and ignore its links.
    • noindex can also be sent as an HTTP header (X-Robots-Tag) for non-HTML files like PDFs.

    The mistake almost everyone makes

    Here’s the trap: to reliably noindex a page, Google must be able to crawl it and read the meta robots tag. If you Disallow that same page in robots.txt, Google never fetches it, never sees the noindex, and the URL can linger in search results anyway.

    ❌ Conflicting signals

    # robots.txt
    Disallow: /private-page/
    
    # /private-page/ <head>
    <meta name="robots" content="noindex">
    # Google never crawls it, never sees noindex → may stay indexed

    Rule of thumb: if you want a page gone from Google, use noindex and make sure robots.txt allows crawling of it. Only use robots.txt Disallow to save crawl budget on sections you don’t care about indexing at all.

    When to use which

    Goal Use
    Keep a page out of Google reliably Meta robots noindex (allow crawling)
    Stop bots wasting crawl budget on admin/cart/search URLs robots.txt Disallow
    Hide a page but keep passing link equity noindex, follow
    Block a whole folder from crawling robots.txt Disallow: /folder/
    Keep a PDF or image out of search X-Robots-Tag: noindex header
    Point crawlers to your sitemap robots.txt Sitemap: line

    How they work together

    Used correctly, they’re a team: robots.txt keeps crawlers out of the areas that would waste their time (admin, cart, faceted URLs), while meta robots precisely controls which of your crawlable pages actually show up in search. Neither one forces Google to index a page — that’s always Google’s call — but together they give clear crawl and index signals.

    The bottom line

    Remember the split: robots.txt = crawling, meta robots = indexing. To remove a page from search, reach for noindex and leave it crawlable. To conserve crawl budget on junk URLs, reach for robots.txt Disallow. Never block a page in robots.txt and expect a noindex on it to work — that’s the contradiction that quietly leaves private pages in Google.

    Frequently asked questions

    Does robots.txt Disallow remove a page from Google?

    Not reliably. Disallow stops crawling, but if the URL is linked from elsewhere, Google can still index it (often without a description). To remove a page from search, use a meta robots noindex tag and keep the page crawlable.

    Can I use both robots.txt and meta robots on the same page?

    You can, but be careful: if robots.txt disallows the page, Google can’t crawl it and therefore can’t read its noindex tag. For a noindex to work, the page must be crawlable.

    What’s the difference between noindex and nofollow?

    noindex keeps the page out of search results. nofollow tells search engines not to follow the links on that page. They’re independent — noindex, follow is a common combination.

    Where does the meta robots tag go?

    In the <head> section of the individual page’s HTML: <meta name="robots" content="noindex, follow">. For non-HTML files like PDFs, use the X-Robots-Tag HTTP header instead.

    Which should I use to save crawl budget?

    robots.txt. Disallowing large, low-value sections (admin, internal search, faceted URLs) stops crawlers wasting requests there. Meta robots doesn’t save crawl budget because the page still has to be crawled to read the tag.

    Related tools & guides

  • The Complete XML Sitemap Guide (2026)

    The Complete XML Sitemap Guide (2026)

    If Google can’t find your pages, it can’t rank them. An XML sitemap is the single simplest way to hand a search engine a clean, complete list of everything on your site worth indexing. This guide walks through exactly what a sitemap is, when it actually moves the needle, how to build one for any platform, and how to submit it the right way in 2026.

    What is an XML sitemap?

    An XML sitemap is a machine-readable file — almost always at /sitemap.xml — that lists the URLs on your site you want search engines to crawl and index. Each entry can include a few optional hints: when the page was last modified, how often it changes, and its relative priority.

    Think of it as the index at the back of a book. Search engines can find your pages by following links, but a sitemap guarantees nothing important gets missed — especially deep pages, newly published content, or pages that aren’t linked from many places yet.

    What a real sitemap looks like

    A minimal, valid XML sitemap follows the sitemaps.org protocol and looks like this:

    sitemap.xml

    <?xml version="1.0" encoding="UTF-8"?>
    <urlset xmlns="http://www.sitemaps.org/schemas/sitemap/0.9">
      <url>
        <loc>https://example.com/</loc>
        <lastmod>2026-07-01</lastmod>
      </url>
      <url>
        <loc>https://example.com/blog/</loc>
        <lastmod>2026-07-15</lastmod>
      </url>
    </urlset>

    Only two things are required: the <urlset> wrapper with the correct namespace, and one <loc> per URL. Everything else is optional. In practice, <lastmod> is the one extra field worth keeping accurate — Google uses it as a hint for re-crawling. It largely ignores <changefreq> and <priority>, so don’t lose sleep over them.

    Sitemap index files (for bigger sites)

    A single sitemap can hold up to 50,000 URLs or 50 MB uncompressed, whichever comes first. Larger sites split their URLs across several sitemaps and tie them together with a sitemap index file:

    sitemap-index.xml

    <?xml version="1.0" encoding="UTF-8"?>
    <sitemapindex xmlns="http://www.sitemaps.org/schemas/sitemap/0.9">
      <sitemap>
        <loc>https://example.com/post-sitemap.xml</loc>
      </sitemap>
      <sitemap>
        <loc>https://example.com/page-sitemap.xml</loc>
      </sitemap>
    </sitemapindex>

    This is exactly how WordPress, Yoast and most CMS platforms structure things by default: one index that points to separate sitemaps for posts, pages, categories and so on. You submit the index once and search engines discover the rest.

    Do you actually need a sitemap?

    Honest answer: a small, well-linked site (say, under 100 pages where everything is reachable from the menu) will get crawled fine without one. But a sitemap becomes genuinely valuable when:

    • Your site is large, or grows quickly.
    • You publish new content often and want it discovered fast.
    • Some pages aren’t well linked internally (orphan pages).
    • Your site is new and has few backlinks pointing in.
    • You have rich media (images, video) you want surfaced in the right places.

    There’s no downside to having one, so the practical rule is simple: always publish a sitemap. It costs nothing and only helps discovery.

    How to create an XML sitemap

    WordPress

    Since WordPress 5.5, core generates a sitemap automatically at /wp-sitemap.xml. If you use an SEO plugin (or the WPOS SEO engine), you’ll usually get a richer, cleaner sitemap at /sitemap.xml or /sitemap_index.xml. You rarely need to build one by hand.

    Shopify

    Shopify auto-generates /sitemap.xml for every store, split into products, collections, pages and blogs. It updates automatically — you just submit the URL.

    Static or custom sites

    For a hand-built site or a small custom app, the fastest route is a generator: paste your URLs (or your homepage to crawl) and download a ready-to-upload file. Our free XML Sitemap Generator does exactly this — no signup, and the file is built right in your browser.

    How to submit your sitemap to Google

    1. Open Google Search Console and select your property.
    2. In the left menu, go to Sitemaps.
    3. Enter your sitemap path (e.g. sitemap.xml) and click Submit.
    4. Wait for the status to read Success — Google will report how many URLs it discovered.

    You don’t need to resubmit every time you publish; search engines re-fetch known sitemaps on their own schedule. Submit once, then only revisit if you restructure the site.

    Link your sitemap from robots.txt

    Beyond Search Console, the other standard way to advertise your sitemap is a single line in your robots.txt file. Every major crawler reads it:

    robots.txt

    User-agent: *
    Allow: /
    
    Sitemap: https://example.com/sitemap.xml

    This is the belt-and-suspenders approach: the Sitemap: directive means bots that never touch Search Console (Bing, DuckDuckGo, and AI crawlers) still find your sitemap. If you don’t have a robots.txt yet, our Robots.txt Generator can create one with the sitemap line already included. For the full breakdown, see our complete robots.txt guide.

    Common sitemap mistakes

    • Listing non-canonical or redirected URLs. Only include the final, indexable version of each page. Never list URLs that 301/302 or 404.
    • Including noindexed pages. If a page is noindex, keep it out of the sitemap — mixing signals confuses crawlers.
    • Blocking the sitemap in robots.txt. Make sure you haven’t accidentally disallowed the path the sitemap lives on.
    • Stale lastmod dates. A lastmod that never changes is worse than none. Either keep it accurate or drop it.
    • Forgetting to update after a migration. After changing domains or URL structures, regenerate and resubmit.

    Sitemaps vs robots.txt: what does what

    These two files are often confused, but they do opposite jobs:

    • The sitemap says “here’s what I want you to crawl.” It’s an invitation.
    • robots.txt says “here’s what I don’t want you to crawl.” It’s a boundary.

    Used together, they give search engines a clear map plus clear no-go zones. Neither one forces indexing — that’s still Google’s call — but together they make its job far easier.

    The bottom line

    An XML sitemap won’t magically boost your rankings, but it removes the biggest risk for a growing site: pages that never get discovered. Publish one, keep it clean (indexable, canonical URLs only), reference it from robots.txt, and submit it once in Search Console. Then get back to the work that actually moves rankings — great content and links.

    Frequently asked questions

    Where should my sitemap be located?

    At the root of your domain, typically https://yoursite.com/sitemap.xml. It can technically live elsewhere if you submit it directly in Search Console, but the root is the convention every crawler expects.

    How often should I update my sitemap?

    If it’s generated automatically (WordPress, Shopify, most SEO plugins), it updates itself whenever you publish. For a hand-built file, regenerate it whenever you add or remove pages. You don’t need to resubmit each time — search engines re-crawl known sitemaps on their own.

    What’s the maximum size of a sitemap?

    50,000 URLs or 50 MB uncompressed per file, whichever comes first. Beyond that, split your URLs across multiple sitemaps and reference them from a single sitemap index file.

    Do I need both an XML sitemap and a robots.txt?

    Yes — they do different jobs. The sitemap lists pages you want crawled; robots.txt sets rules for what shouldn’t be crawled. Adding a Sitemap: line to robots.txt is the best-practice way to link the two.

    Will a sitemap improve my Google rankings?

    Not directly. A sitemap helps Google discover and crawl your pages faster and more completely, which is a prerequisite for ranking — but the ranking itself still depends on content quality, relevance and links.

    Should I include images and videos in my sitemap?

    You can, using the image and video sitemap extensions, if visual content is important to your traffic (e.g. a photography or recipe site). For most sites the standard URL sitemap is enough.

    Related tools & guides

  • Robots.txt for WordPress: The Complete 2026 Guide

    Robots.txt for WordPress: The Complete 2026 Guide

    If you run a WordPress site, there is a good chance you have never actually seen your robots.txt file — and yet it is quietly shaping how Google crawls every page you publish. WordPress generates one for you automatically, in memory, and most people never touch it. That is fine until the day you need to change it and discover there is no file to edit.

    This guide walks through exactly how robots.txt works on WordPress: where it lives, what the default rules do, a safe template you can copy, the handful of mistakes that quietly tank crawling, and how to check your work. No fluff, just the things that matter for a real WordPress site.

    What robots.txt actually does on WordPress

    A robots.txt file sits at the root of your domain (https://yoursite.com/robots.txt) and tells search engine crawlers which parts of your site they are welcome to request. It is the first file Googlebot looks for when it visits.

    Two things are worth burning into memory before you touch anything:

    • Robots.txt controls crawling, not indexing. Blocking a URL here stops bots from fetching it — but a blocked URL can still appear in search results if other pages link to it. To keep something out of the index, you need a noindex meta tag, not a Disallow rule.
    • It is a public file. Anyone can read yours. Never use it to “hide” login pages, private folders, or sensitive URLs — you are just handing out a map.

    The virtual file gotcha (this trips up everyone)

    Here is the part unique to WordPress. By default there is no physical robots.txt file on your server. WordPress creates a virtual one on the fly every time a bot requests it, using the do_robots hook. If you FTP into your site and look in the root folder, you will find nothing named robots.txt — but the URL still works.

    This matters because it changes how you edit it:

    • If no physical file exists, WordPress serves its virtual default (shown below).
    • The moment you upload a real robots.txt file to the site root, WordPress stops generating the virtual one and serves your file instead. Your file wins.
    • Most SEO plugins (Yoast, Rank Math, All in One SEO) let you edit the virtual file through the dashboard by filtering that same hook — so you get a real editor without touching FTP.

    What WordPress puts in the default robots.txt

    Out of the box, a WordPress site serves something close to this:

    Default WordPress robots.txt

    User-agent: *
    Disallow: /wp-admin/
    Allow: /wp-admin/admin-ajax.php
    
    Sitemap: https://yoursite.com/wp-sitemap.xml

    It is intentionally minimal, and honestly it is close to correct for most sites. It blocks the admin area, keeps admin-ajax.php open (many themes and plugins need it for front-end features), and points to the core sitemap. If your whole SEO setup is “leave it alone,” you could do a lot worse.

    A better robots.txt template for WordPress

    For a typical content or business site, this is a clean, safe starting point. Adjust the sitemap URL to match yours.

    Recommended WordPress robots.txt

    User-agent: *
    Disallow: /wp-admin/
    Allow: /wp-admin/admin-ajax.php
    Disallow: /?s=
    Disallow: /search/
    Disallow: /*?replytocom
    Disallow: /trackback/
    
    Sitemap: https://yoursite.com/wp-sitemap.xml

    What the extra lines do: /?s= and /search/ stop crawlers from wasting crawl budget on internal search result pages (which are thin and infinite). ?replytocom and /trackback/ block the low-value comment-reply and trackback URLs WordPress generates. None of this blocks a single real page or post.

    Rather than hand-editing, you can build a rule set for your exact setup — WordPress, WooCommerce, or a custom stack — with our free Robots.txt Generator. It writes valid syntax for you and adds the sitemap line automatically.

    What you should NOT block on WordPress

    This is where most robots.txt damage happens. A few Disallow lines that look tidy will actively hurt your rankings:

    • Never block /wp-content/. Your images, and often your CSS and JavaScript, live here. If Google cannot fetch your CSS/JS, it cannot render your pages properly and may judge them as broken or non-mobile-friendly.
    • Never block /wp-includes/ wholesale. Older “SEO hardening” guides told you to. Modern Google explicitly asks you not to — it needs those assets to render.
    • Do not block /wp-content/uploads/. That is your media library. Blocking it kills Google Images traffic.
    • Do not block your category or tag archives here if you want them indexed. If you want them out of the index, use a noindex tag (via your SEO plugin) instead — see the distinction below.

    Blocking specific bots

    You can set rules per crawler. A common example is allowing Google fully while slowing down or blocking a scraper:

    Per-bot rules

    User-agent: Googlebot
    Allow: /
    
    User-agent: AhrefsBot
    Crawl-delay: 10
    
    User-agent: SemrushBot
    Disallow: /

    A word of caution: well-behaved bots (Google, Bing) respect these rules; malicious scrapers ignore robots.txt entirely. Use it for crawl management, not security. And in 2026, many site owners also add explicit rules for AI crawlers like GPTBot and PerplexityBot — allow or disallow them based on whether you want your content used for AI training and answers.

    WooCommerce and plugin considerations

    If you run a store, WordPress and WooCommerce generate URLs you almost certainly do not want crawled:

    WooCommerce additions

    Disallow: /cart/
    Disallow: /checkout/
    Disallow: /my-account/
    Disallow: /*add-to-cart=*

    The cart, checkout, and account pages are user-specific and have no search value, and the add-to-cart query strings create endless duplicate URLs. Blocking them keeps crawlers focused on your product and category pages, where the traffic actually is.

    Common WordPress robots.txt mistakes

    • Leaving a Disallow: / from a staging site. Developers block everything during a build. If that line survives launch, you have told Google to crawl nothing. This is the single most common way a new WordPress site gets zero traffic.
    • Using robots.txt to deindex. Blocking a page here does not remove it from Google — it just stops Google from seeing the noindex tag on it. To remove a page, allow crawling and add noindex.
    • Blocking CSS/JS. Covered above, but it is worth repeating: it breaks rendering.
    • Forgetting the sitemap line. It is a free, direct signal to crawlers. Always include it.
    • Editing the wrong file. If your SEO plugin manages a virtual robots.txt but you also uploaded a physical one, the physical file wins and your plugin edits do nothing.

    Robots.txt vs noindex: which to use

    This is the distinction that fixes 90% of confusion. They solve different problems:

    When to use which

    Goal: Save crawl budget on junk URLs  → robots.txt Disallow
    Goal: Keep a page out of Google       → noindex meta tag
    Goal: Both                            → allow crawl + noindex
                                            (NOT Disallow — the bot must
                                             be able to see the noindex)

    Rule of thumb: if you never want a bot to fetch it, use robots.txt. If you are fine with fetching but want it kept out of search results, use noindex. If you want a page gone from Google, do not block it in robots.txt, because then Google can’t read the noindex tag telling it to leave.

    How to test your robots.txt

    After any change, verify it:

    • Load it directly: visit https://yoursite.com/robots.txt in a browser. What you see is what bots see.
    • Google Search Console: the robots.txt report shows the fetched version, when it was last crawled, and any parse errors.
    • Spot-check a URL: use the URL Inspection tool in Search Console to confirm an important page is not accidentally blocked.
    • Confirm your sitemap resolves: the URL in your Sitemap: line should return a valid XML sitemap, not a 404.

    Two of our tools pair naturally with this: build the file with the Robots.txt Generator, then generate the matching sitemap with the XML Sitemap Generator so the two line up.

    Frequently asked questions

    Does WordPress have a robots.txt file by default?

    Yes, but it is virtual — generated in memory, not saved as a file on your server. Visiting yoursite.com/robots.txt shows it. As soon as you upload a real file to the site root, WordPress serves that instead.

    How do I edit robots.txt in WordPress without FTP?

    Use an SEO plugin. Yoast, Rank Math, and All in One SEO all include a robots.txt editor in the dashboard that modifies the virtual file for you — no FTP or file manager needed.

    Should I block wp-admin in robots.txt?

    WordPress already does, and that is fine — but always keep the Allow: /wp-admin/admin-ajax.php line, because many themes and plugins use that endpoint for front-end functionality that Google needs to render.

    Will robots.txt remove a page from Google?

    No. Blocking a URL stops crawling, but the page can still be indexed from external links. To remove a page, allow crawling and add a noindex meta tag so Google can see the instruction to drop it.

    Do I need a robots.txt file at all?

    Not strictly — a site with no robots.txt is crawled normally. But a good one saves crawl budget on junk URLs and points bots to your sitemap, so it is worth having on any WordPress site.

    Where do I add the sitemap in robots.txt on WordPress?

    Add a line Sitemap: https://yoursite.com/wp-sitemap.xml (or your plugin’s sitemap URL) anywhere in the file — it is not tied to a User-agent block. Point it at whichever sitemap your site actually serves.

    The short version

    For most WordPress sites, the default robots.txt is nearly right — the wins come from a few careful additions (block internal search and store-only URLs, always include your sitemap) and, more importantly, from not making the classic mistakes: never block CSS/JS or /wp-content/, never leave a staging Disallow: / in place, and never confuse robots.txt with noindex. Get those right, verify in Search Console, and you can safely forget about the file for years.

    Ready to build yours? Generate a valid file in seconds with the Robots.txt Generator, pair it with the XML Sitemap Generator, and if you want the full background, read The Complete Robots.txt Guide 2026.

  • The Complete Robots.txt Guide 2026

    The Complete Robots.txt Guide 2026

    The first time robots.txt cost me traffic, I didn’t even know it happened. A staging site went live with a single leftover line — Disallow: / — and for almost two weeks Google politely stayed away from the entire thing. No error, no warning, just a slow, confusing slide in impressions until I finally opened the file and felt my stomach drop.

    That’s the strange thing about robots.txt. It’s one of the smallest files on your website — often just a few lines of plain text — yet it sits at the very front door of how search engines see you. Get it right and it quietly does its job for years. Get one character wrong and you can hide your whole site from Google without realizing it.

    This guide walks through everything, from the absolute basics to the advanced edge cases. Whether you run a WordPress blog, a Shopify store, or a custom-built app, by the end you’ll understand exactly what to put in your robots.txt file, what to keep out of it, and how to check your work before it goes live.

    What is robots.txt?

    Robots.txt is a plain text file that lives in the root folder of your website. Its job is to tell automated visitors — search engine crawlers, bots, and scrapers — which parts of your site they’re allowed to request and which parts they should leave alone.

    When a well-behaved crawler like Googlebot arrives at your site, the first thing it does is look for a file at a very specific address:

    https://yourdomain.com/robots.txt

    If it finds one, it reads the rules before crawling anything else. If it doesn’t find one, it assumes everything is fair game and crawls whatever it can reach. That’s an important point people miss: no robots.txt file means “crawl everything,” not “crawl nothing.”

    The name is short for “robots exclusion” and the format is governed by the Robots Exclusion Protocol, a standard that’s been around since 1994 and was finally formalized by the IETF in 2022. Every major search engine respects it.

    Robots.txt is a request, not a lock. Good bots obey it. Malicious bots and scrapers can — and do — ignore it completely. Never use robots.txt to hide sensitive information; use passwords and proper access control for that.

    Why robots.txt matters for SEO

    You might be wondering why you’d ever want to stop search engines from crawling parts of your site. Isn’t more crawling better? Not always. Here’s why the file matters.

    It protects your crawl budget

    Search engines don’t crawl every page on every site on every visit. They allocate a rough budget of how many pages they’ll fetch from you in a given window. If a big chunk of that budget gets spent on pages that don’t matter — internal search results, filter combinations, admin URLs — your genuinely important pages get crawled less often. Robots.txt lets you steer crawlers away from the low-value stuff.

    It keeps clutter out of the crawl path

    Most sites generate a surprising number of throwaway URLs: session parameters, faceted navigation, print versions, staging directories. Blocking these keeps crawlers focused on the content you actually want ranked.

    It points crawlers to your sitemap

    Robots.txt is also the conventional place to announce where your XML sitemap lives, which helps search engines discover your important pages faster. We’ll cover that pairing in detail later.

    It prevents server strain

    On large or resource-heavy sites, aggressive crawling can slow things down for real visitors. Thoughtful robots.txt rules reduce unnecessary requests.

    The flip side is the danger I opened with: because robots.txt is so powerful, a careless rule can deindex pages you desperately want ranked. Respect it, test it, and change it deliberately.

    Robots.txt syntax explained

    The good news is that the syntax is genuinely simple. A robots.txt file is a list of rules, and each rule has two parts: who the rule applies to, and what they can or can’t do.

    Here is the smallest useful example:

    User-agent: *
    Disallow: /private/

    Read out loud, that says: “To every crawler (* means all of them), you are not allowed to crawl anything inside the /private/ folder.” Everything else on the site is allowed by default.

    A few rules of the road for the format itself:

    • Each directive goes on its own line.
    • Directive names are not case-sensitive (User-agent and user-agent both work), but the paths you list are case-sensitive.
    • Lines starting with # are comments and are ignored by crawlers — use them to leave notes for yourself.
    • Paths are relative to the root, always starting with a /.
    • A blank line separates one rule group from the next.

    The common directives

    You only need to understand four directives to handle 95% of real-world situations. Let’s take them one at a time.

    User-agent

    This line names the crawler a rule group applies to. The asterisk * is a wildcard meaning “all crawlers.” You can also target specific bots by name:

    # Rules for everyone
    User-agent: *
    Disallow: /cart/
    
    # A special rule just for Google's image crawler
    User-agent: Googlebot-Image
    Disallow: /private-photos/

    Some crawler names worth knowing: Googlebot (Google’s main crawler), Bingbot (Microsoft Bing), Googlebot-Image, and increasingly the AI crawlers like GPTBot and ClaudeBot that fetch content for large language models.

    Disallow

    This tells the named crawler not to request URLs that begin with the given path. A few examples make the pattern clear:

    Disallow: /admin/        # blocks the whole /admin/ folder
    Disallow: /search        # blocks any URL starting with /search
    Disallow: /*.pdf$        # blocks every URL ending in .pdf
    Disallow:                # an empty Disallow blocks nothing — allows all

    Notice the last one. An empty Disallow: value is the standard way to say “this crawler may access everything.”

    Allow

    Allow is the exception-maker. It’s most useful when you’ve blocked a whole folder but want to permit one specific thing inside it:

    User-agent: *
    Disallow: /wp-admin/
    Allow: /wp-admin/admin-ajax.php

    That blocks the entire WordPress admin area except the one file that themes and plugins legitimately need crawlers to reach. When rules conflict, most modern crawlers follow the most specific (longest) matching path, so the Allow wins here.

    Sitemap

    The Sitemap directive announces the full URL of your XML sitemap. Unlike the others, it isn’t tied to any user-agent — it’s a standalone line, usually placed at the bottom of the file:

    Sitemap: https://yourdomain.com/sitemap.xml

    You can list more than one sitemap line if you have multiple sitemaps. Always use the full, absolute URL here, not a relative path.

    A note on Crawl-delay

    You may see Crawl-delay: 10 in older files, meant to tell a crawler to wait ten seconds between requests. Be aware that Google ignores this directive entirely — you control Google’s crawl rate in Search Console instead. Bing and a few others still honor it, so it’s not useless, just misunderstood.

    WordPress robots.txt examples

    WordPress is where most people meet robots.txt for the first time. By default WordPress generates a small virtual file for you, but the moment you want real control you’ll want your own. Here’s a sensible, safe starting point for a typical WordPress site:

    User-agent: *
    Disallow: /wp-admin/
    Allow: /wp-admin/admin-ajax.php
    Disallow: /?s=
    Disallow: /search/
    
    Sitemap: https://yourdomain.com/wp-sitemap.xml

    What each line is doing:

    • Disallow: /wp-admin/ keeps crawlers out of the dashboard.
    • Allow: /wp-admin/admin-ajax.php re-opens the one file plugins need.
    • Disallow: /?s= and /search/ stop internal search-result pages from being crawled — these are classic crawl-budget wasters.
    • The Sitemap line points to WordPress’s built-in sitemap.

    Notice what’s not here. You’ll sometimes find old tutorials telling you to block /wp-content/ or /wp-includes/. Don’t. Modern Google needs to fetch your CSS and JavaScript from those folders to render and understand your pages. Blocking them can actively hurt your rankings.

    Shopify robots.txt examples

    Shopify is a different story, and it trips people up. On Shopify you don’t have full free-form access to the file the way you do on a self-hosted site. Shopify generates a solid default robots.txt automatically — one that already blocks carts, checkout, and internal search — and for most stores you should simply leave it alone.

    Since 2021, Shopify does let you customize it through a robots.txt.liquid template if you’re on a plan that allows theme code edits. A typical customization looks like adding or removing a rule inside that template rather than writing the file from scratch:

    {% comment %} Block a collection filter that creates duplicate URLs {% endcomment %}
    {%- if group.user_agent.value == '*' -%}
      {{ 'Disallow: /collections/*?*sort_by*' }}
    {%- endif -%}

    Shopify’s default already handles the important exclusions — /cart, /checkout, /account, and search. The main reasons to touch it are blocking messy filtered collection URLs or removing a rule Shopify added that’s blocking something you actually want crawled. If you’re not comfortable editing Liquid, the safe move is to leave the default in place; it’s genuinely well-designed.

    WooCommerce robots.txt examples

    WooCommerce runs on top of WordPress, so you get full control again — and a store adds a few URLs worth managing. Cart, checkout, and account pages hold nothing a search engine needs to index, and blocking them keeps crawlers on your products and categories:

    User-agent: *
    Disallow: /wp-admin/
    Allow: /wp-admin/admin-ajax.php
    Disallow: /cart/
    Disallow: /checkout/
    Disallow: /my-account/
    Disallow: /*add-to-cart=*
    Disallow: /?orderby=
    Disallow: /?filter_*
    
    Sitemap: https://yourstore.com/wp-sitemap.xml

    The two lines to pay attention to are the parameter blocks. /*add-to-cart=* stops crawlers from following those “add to cart” action links, and /?orderby= and /?filter_* keep them out of the endless sorted-and-filtered variations of your shop pages. Those parameter URLs can multiply into thousands of near-identical pages — exactly the kind of thing that drains crawl budget on a busy store.

    One caution specific to stores: never block /product/ or your shop and category pages. It sounds obvious written down, but it’s a mistake I’ve seen happen when someone copies an overly aggressive rule set from a forum.

    Common mistakes and how to avoid them

    Most robots.txt disasters come from a small handful of mistakes. Here are the ones worth burning into memory.

    1. Accidentally blocking the whole site

    The single most damaging line in existence:

    User-agent: *
    Disallow: /

    That forward slash means “the root and everything under it.” It’s the exact line that hid my staging site. It belongs on development servers and nowhere else. If your traffic ever falls off a cliff for no obvious reason, this is the first thing to check.

    2. Using robots.txt to hide a page from search results

    This is the most common misconception in all of SEO. Blocking a URL in robots.txt stops crawling, but it does not guarantee the page stays out of Google’s index. If other sites link to that URL, Google can still list it in results — just without a description, showing “No information is available for this page.” To truly keep a page out of search, use a noindex meta robots tag and allow crawling so Google can see the tag. More on that difference below.

    3. Blocking CSS and JavaScript

    Google renders pages like a browser does. If you block the resources it needs to render — stylesheets, scripts, fonts — it sees a broken version of your page and may judge it poorly. Let crawlers reach your assets.

    4. Getting case wrong

    Paths are case-sensitive. Disallow: /Blog/ will not block /blog/. Match your real URLs exactly.

    5. Forgetting the file after a site migration

    When you move from staging to production, the staging robots.txt often comes along for the ride, complete with its Disallow: /. Migration checklists exist for a reason — put “review robots.txt” near the top of yours.

    How to test a robots.txt file

    Never publish a robots.txt change and just hope. Testing takes two minutes and saves weeks of grief.

    1. View the live file. Type your domain followed by /robots.txt into a browser. What you see is exactly what crawlers see.
    2. Use Google Search Console. Search Console reports whether Google can fetch your robots.txt and flags syntax problems. The URL Inspection tool also tells you if a specific page is blocked from crawling.
    3. Test individual URLs. Before you trust a new rule, confirm that the URLs you meant to block are blocked — and, just as importantly, that the ones you meant to keep are still allowed.
    4. Validate the syntax. A misplaced character can silently break a rule. Running your file through a validator catches problems a quick glance misses.

    If you’d rather not hand-write the file at all, you can generate a clean, correctly formatted one in a couple of clicks with the free ToolBrainy Robots.txt Generator — pick your rules, and it writes valid syntax for you.

    Robots.txt vs meta robots

    This is the distinction that separates people who understand crawling from people who guess at it. Robots.txt and the meta robots tag sound similar and are constantly confused, but they do genuinely different jobs.

    Robots.txt Meta robots tag
    A file at your site root A tag inside a page’s HTML <head>
    Controls crawling (whether a bot fetches the URL) Controls indexing (whether a fetched page appears in results)
    Applies to files, folders, and URL patterns Applies to a single page
    Cannot reliably remove a page from the index Can remove a page from the index with noindex

    Here’s the practical takeaway: to keep a page out of Google, use noindex, and do not block it in robots.txt. Those two instructions fight each other — if you block crawling, Google never fetches the page, so it never sees the noindex tag telling it to drop the page. The meta tag lives in the page’s head like this:

    <meta name="robots" content="noindex, follow">

    Use robots.txt to manage crawling at scale (whole folders, parameters, budget). Use meta robots to control the indexing of specific pages. You can check what meta tags a page is actually serving with the ToolBrainy Meta Tag Analyzer.

    Robots.txt and XML sitemaps

    Robots.txt and your XML sitemap are two halves of the same conversation. Robots.txt tells crawlers where not to go; the sitemap tells them where you’d most like them to go. They work best together.

    Linking your sitemap from robots.txt is a small step with a real payoff — it helps search engines discover your important URLs without waiting to stumble across them through internal links:

    User-agent: *
    Disallow: /wp-admin/
    Allow: /wp-admin/admin-ajax.php
    
    Sitemap: https://yourdomain.com/sitemap.xml

    One rule that catches people out: never list a URL in your sitemap that you’ve blocked in robots.txt. You’d be sending a mixed signal — “please crawl this” and “don’t crawl this” about the same page. Keep the two files consistent. If you need to build or refresh your sitemap, the ToolBrainy Sitemap Generator produces a valid XML file you can point to from this exact directive.

    Crawl budget considerations

    “Crawl budget” is one of those phrases that sounds intimidating and turns out to be simple. It’s just the number of pages a search engine is willing to crawl on your site within a given timeframe, shaped by two things: how much crawling your server can handle without slowing down, and how much Google actually wants to crawl based on your site’s importance and freshness.

    For most small sites — a few hundred pages — crawl budget is a non-issue. Google will happily crawl everything. It starts to matter when you have:

    • Tens of thousands of URLs or more.
    • Lots of auto-generated pages (faceted navigation, filters, calendars, internal search).
    • A large store with countless product-variant and sort-order URLs.

    On sites like those, robots.txt becomes a budget tool. By blocking the low-value, near-duplicate, and infinite-URL traps, you concentrate crawling on the pages that earn you traffic. Think of it as clearing the path so crawlers spend their limited time on your best work rather than wandering through filter combinations no human will ever search for.

    A few habits that protect crawl budget: block internal search results, block obvious parameter clutter, keep your sitemap clean and current, and fix or redirect long chains of broken and redirected URLs so crawlers aren’t chasing dead ends.

    Frequently asked questions

    Where should the robots.txt file be located?

    It must live in the root directory of your domain and be reachable at https://yourdomain.com/robots.txt. Crawlers only look in that exact spot — a robots.txt file placed in a subfolder is ignored. Each subdomain needs its own file too; blog.yourdomain.com uses its own robots.txt, separate from the main domain.

    Do I even need a robots.txt file?

    Not strictly. If you’re happy for search engines to crawl your entire site, you can skip it and nothing breaks. That said, having one is good practice — it lets you point to your sitemap, block low-value URLs, and gives you a place to make crawl decisions later. A simple, permissive file is better than none.

    Will robots.txt keep my page out of Google?

    No, not reliably. Blocking a URL stops crawling, but the page can still appear in search results if other sites link to it. To truly keep a page out of the index, use a noindex meta robots tag and allow crawling so Google can read that tag.

    How often do search engines check robots.txt?

    Google typically caches your robots.txt for up to 24 hours, so changes usually take effect within a day. If you’ve made an urgent fix, you can prompt a faster re-fetch through Google Search Console rather than waiting.

    Can I block AI crawlers like GPTBot in robots.txt?

    Yes. AI crawlers that respect the standard — such as GPTBot and ClaudeBot — read robots.txt like any other bot. Add a rule group naming the crawler and disallow what you want. Keep in mind this only works for bots that choose to obey; it isn’t an enforceable block.

    What happens if my robots.txt has a syntax error?

    Crawlers are fairly forgiving and will ignore lines they can’t parse, applying the rest. The danger is subtler: a malformed rule might silently fail to block what you intended, or an overly broad one might block more than you meant. That’s exactly why testing and validating before publishing is worth the two minutes.

    Bringing it all together

    Robots.txt rewards a little bit of care and punishes carelessness, which is why it’s worth understanding properly rather than copying a random file off a forum. Remember the essentials: it controls crawling, not indexing; an empty or missing file means “crawl everything”; a lone Disallow: / can hide your whole site; and it should always be kept in sync with your XML sitemap.

    Start simple. Block the genuinely useless URLs — admin areas, internal search, cart and checkout on stores — point to your sitemap, and leave your real content and assets fully crawlable. Test the file, watch Search Console for a week, and adjust only when you have a specific reason to.

    Do that, and this tiny text file becomes exactly what it’s meant to be: a quiet, reliable doorman that sends crawlers straight to your best pages and keeps them out of the clutter. If you’d rather skip the hand-editing, the free Robots.txt Generator builds a valid file for you in seconds, and pairing it with the Sitemap Generator, Meta Tag Analyzer, and SERP Preview gives you a complete, no-signup technical-SEO toolkit to get the rest right too.