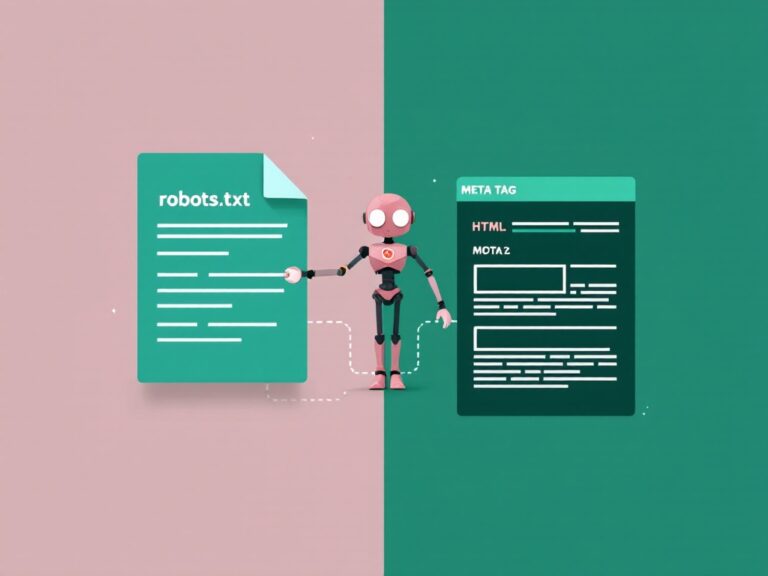
Before editing WordPress robots.txt, identify whether WordPress, a plugin, or a physical file serves it. Back up the current rules, make the smallest necessary change, and verify the public response and important URLs.
What robots.txt actually does on WordPress
A robots.txt file sits at the root of your domain (https://yoursite.com/robots.txt) and tells search engine crawlers which parts of your site they are welcome to request. It is the first file Googlebot looks for when it visits.
Two things are worth burning into memory before you touch anything:
- Robots.txt controls crawling, not indexing. Blocking a URL here stops bots from fetching it — but a blocked URL can still appear in search results if other pages link to it. To keep something out of the index, you need a
noindexmeta tag, not a Disallow rule. - It is a public file. Anyone can read yours. Never use it to “hide” login pages, private folders, or sensitive URLs — you are just handing out a map.
The virtual file gotcha (this trips up everyone)
Here is the part unique to WordPress. By default there is no physical robots.txt file on your server. WordPress creates a virtual one on the fly every time a bot requests it, through WordPress’s robots response, which plugins can customize with the robots_txt filter. If you FTP into your site and look in the root folder, you will find nothing named robots.txt — but the URL still works.
This matters because it changes how you edit it:
- If no physical file exists, WordPress serves its virtual default (shown below).
- The moment you upload a real robots.txt file to the site root, WordPress stops generating the virtual one and serves your file instead. Your file wins.
- SEO plugins differ: some filter the virtual response, while file editors may create or modify a physical file. Editor availability depends on the plugin, permissions and hosting setup. Check the active plugin’s documentation before assuming where changes are stored.
What WordPress puts in the default robots.txt
Out of the box, a WordPress site serves something close to this:
User-agent: *
Disallow: /wp-admin/
Allow: /wp-admin/admin-ajax.php

Sitemap: https://yoursite.com/wp-sitemap.xml
It is intentionally minimal, and honestly it is close to correct for most sites. It blocks the admin area, keeps admin-ajax.php open (many themes and plugins need it for front-end features), and points to the core sitemap. If your whole SEO setup is “leave it alone,” you could do a lot worse.
Identify what serves your file
Check the public URL and save a copy
Open the exact site’s /robots.txt. Record the date, content and sitemap address. A WordPress site in a subdirectory still needs the appropriate robots file at the origin root. Confirm that you are checking the production hostname rather than a staging or www variant.
Check Settings → Reading
On a public site intended for search, review Discourage search engines from indexing this site. This setting is a visibility request, not authentication. Check the generated page-level robots directives as well as robots.txt; behaviour depends on WordPress and the active SEO configuration. Keep private staging sites protected with access controls.
Identify physical files, plugins and caches
Check whether a physical file exists in the public document root through your host’s file manager. Determine whether an active plugin filters the virtual response. Server configuration normally gives a physical file precedence, but hosting rules can alter routing. Compare your intended edit with the public response rather than guessing from the editor screen.
Edit robots.txt safely
Choose one authoritative editing route
If the active plugin provides the intended editor, use it and confirm what it manages. If a physical file controls the response, use the host’s supported file editor. Do not maintain conflicting copies in several plugins. Preserve the old content before changing anything.
Make one narrow change
Write down which URLs should become allowed or blocked. Avoid adding broad exclusions for uploads, scripts or styles. If your actual goal is search exclusion, choose noindex instead of Disallow and keep public resources crawlable so Google can read that instruction.
Publish, clear the relevant cache and recheck
After saving, request the public robots URL again. If the response is unchanged, check the physical-versus-virtual source and the applicable hosting/CDN cache. Clear only the relevant cache through the supported controls, then repeat your tests. Do not assume repeated editor saves will resolve a routing conflict.
Start with minimal rules
A minimal baseline is usually easier to verify than a long collection of copied exclusions. Replace the example domain and sitemap path with the sitemap your site actually serves:
User-agent: *
Disallow: /wp-admin/
Allow: /wp-admin/admin-ajax.php

Sitemap: https://example.com/wp-sitemap.xml
This is a starting point, not a universal prescription. A plugin may use /sitemap_index.xml or another endpoint. Keep the active sitemap and avoid introducing another SEO plugin just to obtain a different filename. Use the robots.txt generator and URL tester to check the complete rules before publication.
Handle optional exclusions deliberately
Internal search and parameter URLs
Before adding /?s=, /search/ or reply-parameter rules, collect actual URL examples from your site. A root-anchored rule may not cover nested paths or a parameter in a different position. Conversely, a broad wildcard can match useful content. For every intended block, test a nearby URL that should remain allowed.
Archives and store pages
Decide whether category and tag archives offer useful landing pages before excluding them. Public noindex pages must remain crawlable for the directive to be read. Cart, checkout and account privacy relies on application access controls; a robots rule is not protection for customer information.
Crawler-specific groups
A separate Googlebot group can supersede the wildcard group for Google. An Allow: / group can therefore discard restrictions you expected it to inherit. Keep a single general group unless you need a deliberate difference, and understand user-agent selection and rule matching before adding exceptions.
What you should NOT block on WordPress
This is where most robots.txt damage happens. A few Disallow lines that look tidy will actively hurt your rankings:
- Never block
/wp-content/. Your images, and often your CSS and JavaScript, live here. If Google cannot fetch your CSS/JS, it cannot render your pages properly and may judge them as broken or non-mobile-friendly. - Never block
/wp-includes/wholesale. Older “SEO hardening” guides told you to. Modern Google explicitly asks you not to — it needs those assets to render. - Do not block
/wp-content/uploads/. That is your media library. Blocking it kills Google Images traffic. - Do not block your category or tag archives here if you want them indexed. If you want them out of the index, use a
noindextag (via your SEO plugin) instead — see the distinction below.
Blocking specific bots
You can set rules per crawler. A common example is allowing Google fully while slowing down or blocking a scraper:
User-agent: Googlebot
Allow: /

User-agent: AhrefsBot
Crawl-delay: 10

User-agent: SemrushBot
Disallow: /
A word of caution: well-behaved bots (Google, Bing) respect these rules; malicious scrapers ignore robots.txt entirely. Use it for crawl management, not security. And in 2026, many site owners also add explicit rules for AI crawlers like GPTBot and PerplexityBot — check each operator’s documentation: search, user-requested fetches and training may use different agents.
WooCommerce and plugin considerations
If you run a store, WordPress and WooCommerce generate URLs you almost certainly do not want crawled:
Disallow: /cart/
Disallow: /checkout/
Disallow: /my-account/
Disallow: /*add-to-cart=*
The cart, checkout, and account pages are user-specific and have no search value, and the add-to-cart query strings create endless duplicate URLs. Blocking them keeps crawlers focused on your product and category pages, where the traffic actually is.
Common WordPress robots.txt mistakes
- Leaving a
Disallow: /from a staging site. Developers block everything during a build. If that line survives launch, you have told Google to crawl nothing. This is one possible cause of blocked crawling, not proof of the cause of a traffic drop. - Using robots.txt to deindex. Blocking a page here does not remove it from Google — it just stops Google from seeing the
noindextag on it. To remove a page, allow crawling and addnoindex. - Blocking CSS/JS. Covered above, but it is worth repeating: it breaks rendering.
- Forgetting the sitemap line. It is a free, direct signal to crawlers. Always include it.
- Editing the wrong file. If your SEO plugin manages a virtual robots.txt but you also uploaded a physical one, the physical file wins and your plugin edits do nothing.
Robots.txt vs noindex: which to use
This is the distinction that fixes 90% of confusion. They solve different problems:
Goal: Save crawl budget on junk URLs  → robots.txt Disallow
Goal: Keep a page out of Google       → noindex meta tag
Goal: Exclude a public page from search → allow crawl + noindex
                                        (NOT Disallow — the bot must
                                         be able to see the noindex)
Rule of thumb: if you never want a bot to fetch it, use robots.txt. If you are fine with fetching but want it kept out of search results, use noindex. If you want a page gone from Google, do not block it in robots.txt, because then Google can’t read the noindex tag telling it to leave.
How to test your robots.txt
Test representative URLs
Use the robots.txt tester to test your WordPress robots.txt rules against the homepage, a recent post, a category, an upload, a stylesheet, a script and the admin AJAX endpoint. Add the search or parameter URLs you intend to exclude. Save expected and actual results for the relevant crawler.
Check the actual sitemap and page directives
Open the address named by the Sitemap directive. Follow the XML sitemap validation checklist to confirm XML, canonical URLs and no unwanted noindex entries. Check a representative page’s head and response headers; a permissive robots file does not cancel noindex elsewhere.
Review Search Console after publication
Check the robots.txt report’s fetched version and date, then inspect an important URL. Separate stored indexing information from a live test. Watch for recrawling rather than repeatedly changing working rules to force indexing.
Investigate access errors separately
If requests receive 403, 429 or 5xx responses, involve hosting support and provide the affected URL and time. Ask for verified Googlebot log evidence. A challenge shown to your own browser does not establish that Googlebot is blocked. Restore your backup if an actual rule regression is found.
Frequently asked questions
Does WordPress have a robots.txt file by default?
Yes, but it is virtual — generated in memory, not saved as a file on your server. Visiting yoursite.com/robots.txt shows it. As soon as you upload a real file to the site root, WordPress serves that instead.
How do I edit robots.txt in WordPress without FTP?
Use an SEO plugin. Check whether your active SEO plugin provides a robots.txt editor and whether it changes a physical file or filters the virtual response. Features and permissions vary. If no editor is available, use your host’s supported file-management workflow.
Should I block wp-admin in robots.txt?
WordPress already does, and that is fine — but always keep the Allow: /wp-admin/admin-ajax.php line, because many themes and plugins use that endpoint for front-end functionality that Google needs to render.
Will robots.txt remove a page from Google?
No. Blocking a URL stops crawling, but the page can still be indexed from external links. To remove a page, allow crawling and add a noindex meta tag so Google can see the instruction to drop it.
Do I need a robots.txt file at all?
Not strictly — a site with no robots.txt is crawled normally. But a good one saves crawl budget on junk URLs and points bots to your sitemap, so it is worth having on any WordPress site.
Where do I add the sitemap in robots.txt on WordPress?
Add a line Sitemap: https://yoursite.com/wp-sitemap.xml (or your plugin’s sitemap URL) anywhere in the file — it is not tied to a User-agent block. Point it at whichever sitemap your site actually serves.
The short version
For most WordPress sites, the default robots.txt is nearly right — the wins come from a few careful additions (block internal search and store-only URLs, always include your sitemap) and, more importantly, from not making the classic mistakes: never block CSS/JS or /wp-content/, never leave a staging Disallow: / in place, and never confuse robots.txt with noindex. Get those right, verify in Search Console, and review the file again after migrations, plugin changes or indexing problems.
Ready to build yours? Generate a valid file in seconds with the Robots.txt Generator, pair it with the XML Sitemap Generator, and if you want the full background, read The Complete Robots.txt Guide 2026.
Reference documentation
See WordPress’s robots response documentation and Google’s robots.txt specification. Plugin editors differ, so use the documentation for the plugin active on your own site.
Editorial note: Updated September 29, 2026 with AI assistance. Instructions were reviewed against the relevant tool implementation and documentation; examples are illustrative rather than claims of personal experience.
Handy tools for this topic
Free online tools, no signup
Every ToolBrainy tool runs right in your browser — no accounts, no watermarks and no limits. Compress a PDF, generate a strong password, convert an image and plenty more.